How to Tie the Woolly Bugger: The Complete Guide (All Variants)
Estimated read time: 10 minutes
If you're going to learn to tie one fly, tie the Woolly Bugger.
It's not the most beautiful pattern. It doesn't imitate any single creature with scientific precision. But it catches fish — trout, bass, yellowfish, pike, perch, carp — on virtually every freshwater fishery in the world. Strip it fast and it looks like a fleeing baitfish. Dead drift it and it pulses like a leech. Fish it on the bottom and it could be a crayfish, a stonefly nymph, or something the fish has simply never seen before but instinctively wants to eat.
The Woolly Bugger is also one of the best flies a beginner tier can learn. It teaches the core skills — thread control, palmering a hackle, managing a marabou tail — that transfer directly to dozens of other patterns. Tie it well and you'll catch fish for the rest of your fly fishing life.
This guide covers the standard Woolly Bugger, the beadhead variant, the crystal bugger, and a few other popular variations — with step-by-step instructions and an embedded tying video from one of fly fishing's best tying channels, Fly Fish Food.
Table of Contents
- A Brief History of the Woolly Bugger
- Why the Woolly Bugger Works
- Materials You'll Need
- The Standard Woolly Bugger: Step by Step
- Tying Video: Woolly Bugger
- The Beadhead Woolly Bugger
- The Crystal Bugger
- Colour Variations and When to Use Them
- How to Fish the Woolly Bugger
- Frequently Asked Questions
A Brief History of the Woolly Bugger
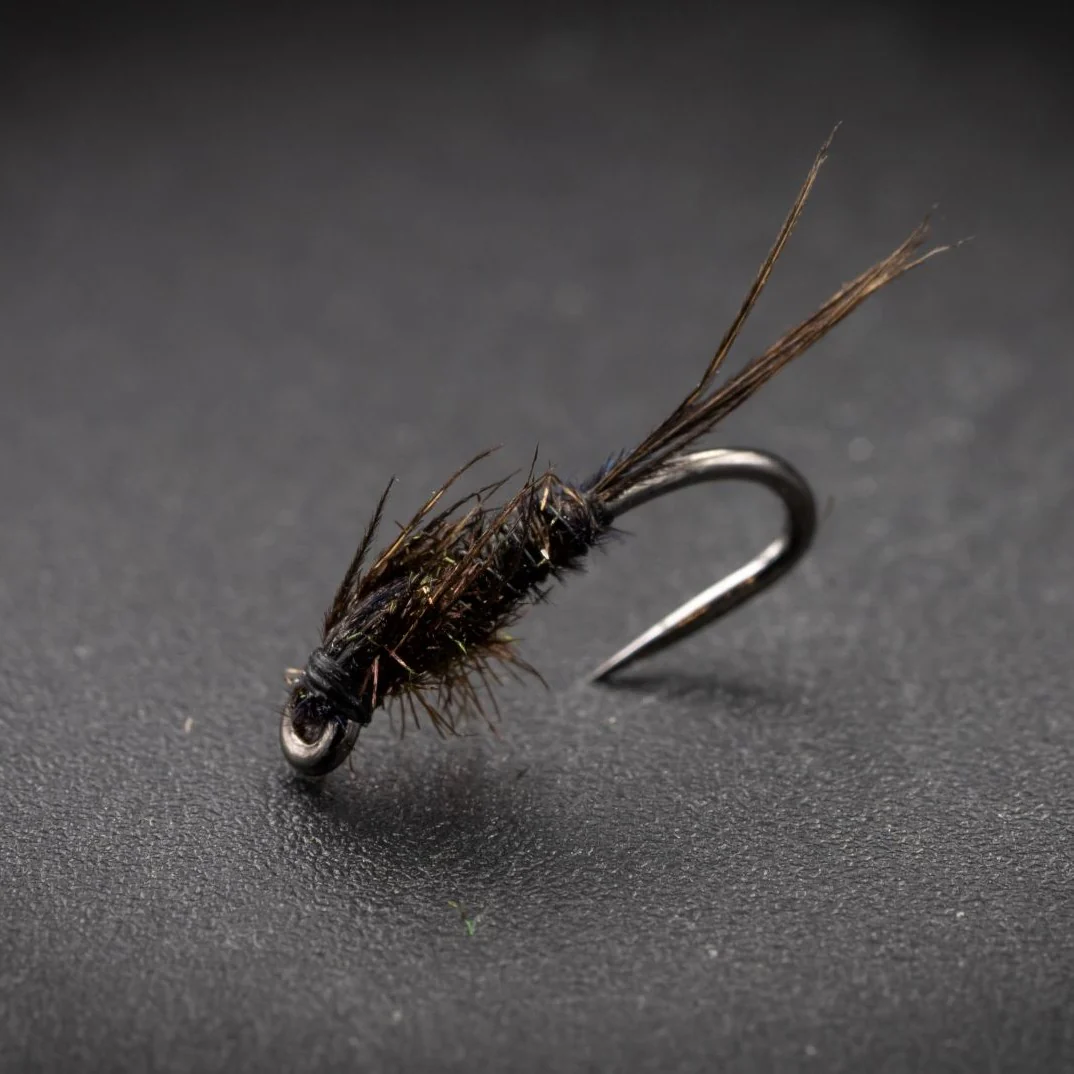
The Woolly Bugger was developed by American fly tier Russell Blessing in 1967, designed to imitate the hellgrammite — the larval form of the dobsonfly — for smallmouth bass fishing in Pennsylvania. Blessing combined a marabou tail with a palmered hackle body, and the result was a fly with so much inherent movement and appeal that it quickly spread beyond its original purpose.
Within a decade it was being fished for trout across North America. Within two it had crossed to Europe, Australasia, and Africa. Today it's tied in every colour imaginable, in sizes from 2 to 14, with beads, cones, rubber legs, flash, and dozens of other additions — but the core design remains essentially unchanged from Blessing's original.
It's one of the most successful fly patterns ever created.
Why the Woolly Bugger Works
The Woolly Bugger's effectiveness comes down to movement. Marabou — the soft, fluffy feather used for the tail — is extraordinarily alive in water. Even the slightest current causes it to pulse and breathe. The palmered hackle adds legs, texture, and a profile that displaces water. Together they create a fly that looks alive even when it's sitting still.
This movement triggers a predatory response in fish that more precise imitations often don't. A trout that refuses a perfectly tied size 18 dry fly will sometimes chase a black Woolly Bugger across a pool without hesitation. Bass, pike, and other aggressive species find the pulsing profile irresistible.
The other reason it works: it's ambiguous. It doesn't look exactly like anything — which means it looks a little like everything. Fish see it and see food, without the cognitive comparison to a specific natural that causes refusals with more imitative patterns.
Materials You'll Need
For the Standard Woolly Bugger
| Material | Specification | Notes |
|---|---|---|
| Hook | Streamer hook, size 4–10, 3XL | Mustad 9672, Tiemco 5263, or equivalent |
| Thread | 6/0 or 3/0, colour to match body | Black or olive for most applications |
| Tail | Marabou feather, matching body colour | The most important material — buy quality |
| Body | Chenille, medium or large | Matching colour |
| Hackle | Saddle or neck hackle, soft and webby | Matching or contrasting colour |
| Flash (optional) | Krystal Flash or similar | 4–6 strands in tail |
For the Beadhead Variant
Everything above, plus:
- Brass or tungsten bead, sized to hook (3.2mm for size 8, 3.8mm for size 6)
- Tungsten beads sink faster and fish deeper; brass is more affordable
Tools Required
- Fly tying vise
- Bobbin and thread
- Scissors (fine-tipped)
- Hackle pliers
- Whip finisher or half-hitch tool
- Head cement or UV resin
New to fly tying tools? See our Fly Tying Tools guide for a full breakdown of what you need to get started.
The Standard Woolly Bugger: Step by Step
Step 1: Set Up the Hook
Secure the hook in the vise with the shank horizontal and the point angled slightly downward. Start your thread behind the eye and wrap a smooth, even thread base back to the bend of the hook. A good thread base prevents materials from spinning and gives everything something to grip.
Step 2: Tie In the Marabou Tail
Select a marabou feather with good, full fibres. Strip the fluffy base fibres from the stem, leaving a clump of marabou fibres roughly the length of the hook shank. Pinch the fibres and tie them in at the bend with several tight thread wraps. The tail should extend approximately one hook shank length beyond the bend.
Tip: less marabou is usually better than more. An overly full tail loses its movement in the water. Aim for a sparse, flowing tail that will pulse naturally.
Optional: tie in 4–6 strands of Krystal Flash alongside the marabou tail for a subtle sparkle. Trim the flash slightly shorter than the marabou.
Step 3: Tie In the Hackle
Select a saddle or neck hackle feather with fibres roughly equal to the hook gap in length. Strip the base fibres from the stem and tie the hackle in at the bend by its tip, shiny side facing forward. Don't palmer it yet — leave it hanging while you build the body.
Step 4: Tie In and Wrap the Chenille Body
Tie in the chenille at the bend alongside the hackle, leaving a short tag end to trim later. Wrap the chenille forward in touching, even turns toward the eye, stopping about 2–3mm behind the eye to leave room for the head. Tie off the chenille with several firm thread wraps and trim the excess.
Tip: stroke the chenille fibres back as you wrap to avoid trapping them under subsequent turns. A neat, even body makes the finished fly look better and fish better.
Step 5: Palmer the Hackle
This is the defining step of the Woolly Bugger. Using hackle pliers, grasp the butt of the hackle feather and palmer it forward over the chenille body in evenly spaced wraps — roughly 5–7 turns for a size 8 hook. The hackle should spiral forward at a consistent angle, with the fibres splaying outward from the body.
Tie off the hackle behind the eye with several firm thread wraps and trim the excess stem.
Tip: palmer the hackle under slight tension and keep the wraps even. Bunched hackle wraps or gaps look untidy and reduce the fly's effectiveness in water.
Step 6: Build and Finish the Head
Build a neat, tapered thread head behind the eye with several wraps of thread. Whip finish or apply several half-hitch knots to secure. Apply a small drop of head cement or UV resin to the finished head and allow to cure.
Trim any stray hackle fibres from around the eye and admire your work.
Tying Video: Woolly Bugger
The team at Fly Fish Food are among the best fly tying educators on YouTube — clear instruction, excellent camera work, and genuinely useful tips throughout. Watch their Woolly Bugger tutorial below before picking up your materials.
Video credit: Fly Fish Food — one of the best fly tying channels on YouTube. Highly recommended if you're getting into tying.
The Beadhead Woolly Bugger
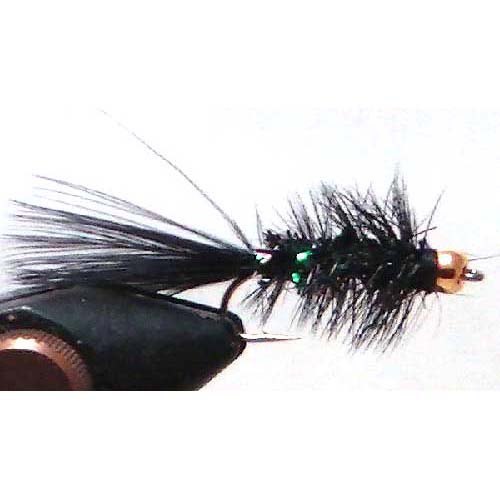
The beadhead variant adds a brass or tungsten bead at the head of the fly — and it's arguably even more effective than the standard version for most fishing situations.
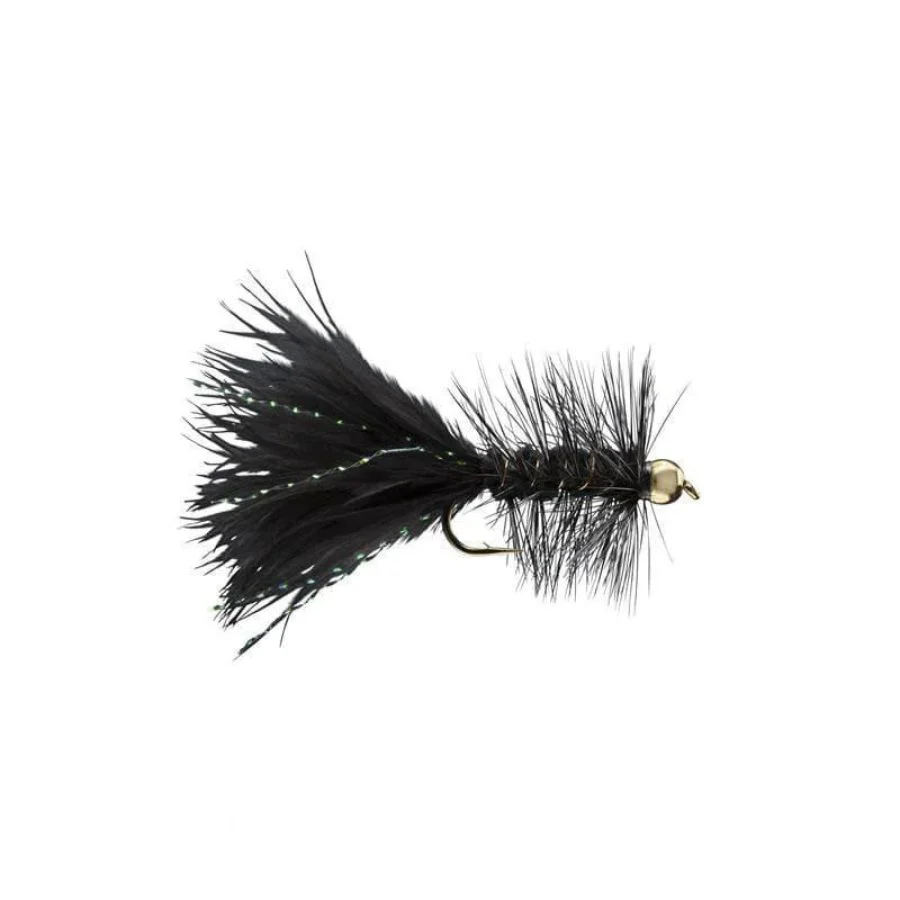
Source: yellowdogflyfishing.com
Why Add a Bead?
- Gets the fly down faster — tungsten in particular sinks quickly, keeping the fly in the strike zone longer in fast or deep water
- The bead adds flash — a gold or silver bead catches light and adds attraction
- Creates a jigging action — the weight of the bead causes the fly to dip and rise on the retrieve, adding movement
How to Tie the Beadhead Variant
The tying sequence is identical to the standard Woolly Bugger with one addition at the start:
Before starting your thread, slide the bead onto the hook with the small hole facing the point. Push the bead up to the eye of the hook. Start your thread behind the bead and proceed as normal. The bead will sit at the head of the fly when finished — no separate head building required.
Bead sizing guide:
| Hook Size | Bead Size |
|---|---|
| Size 4 | 4.6mm |
| Size 6 | 3.8mm |
| Size 8 | 3.2mm |
| Size 10 | 2.8mm |
| Size 12 | 2.4mm |
Tungsten vs brass: Tungsten is heavier and more expensive — worth it for fast water and deep stillwater fishing. Brass is lighter and more affordable — good for slower water and shallower presentations.
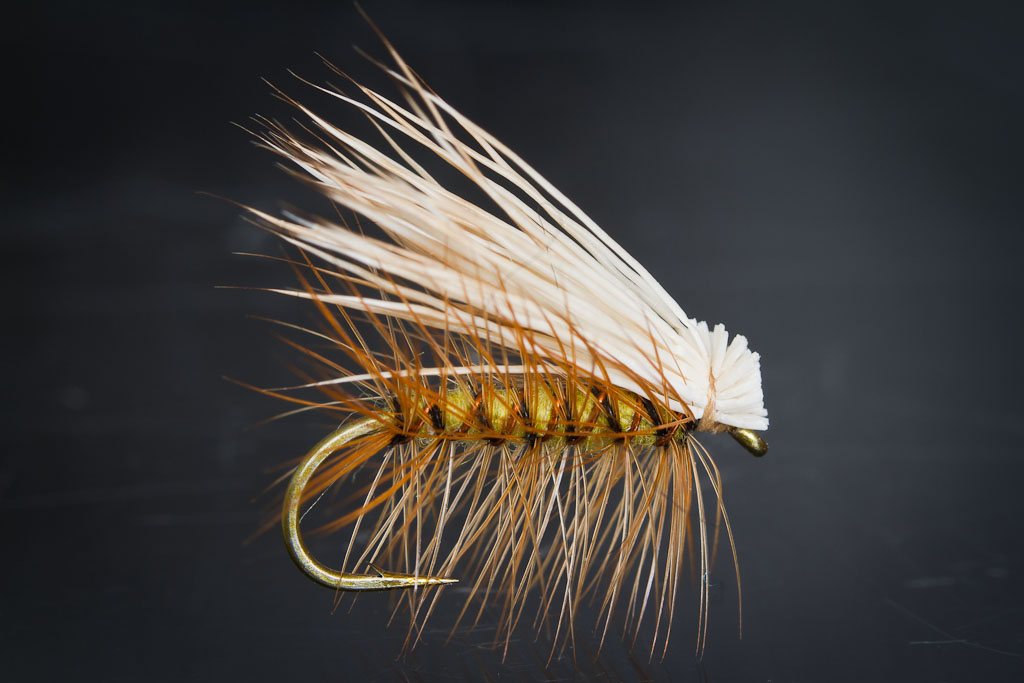
The Crystal Bugger
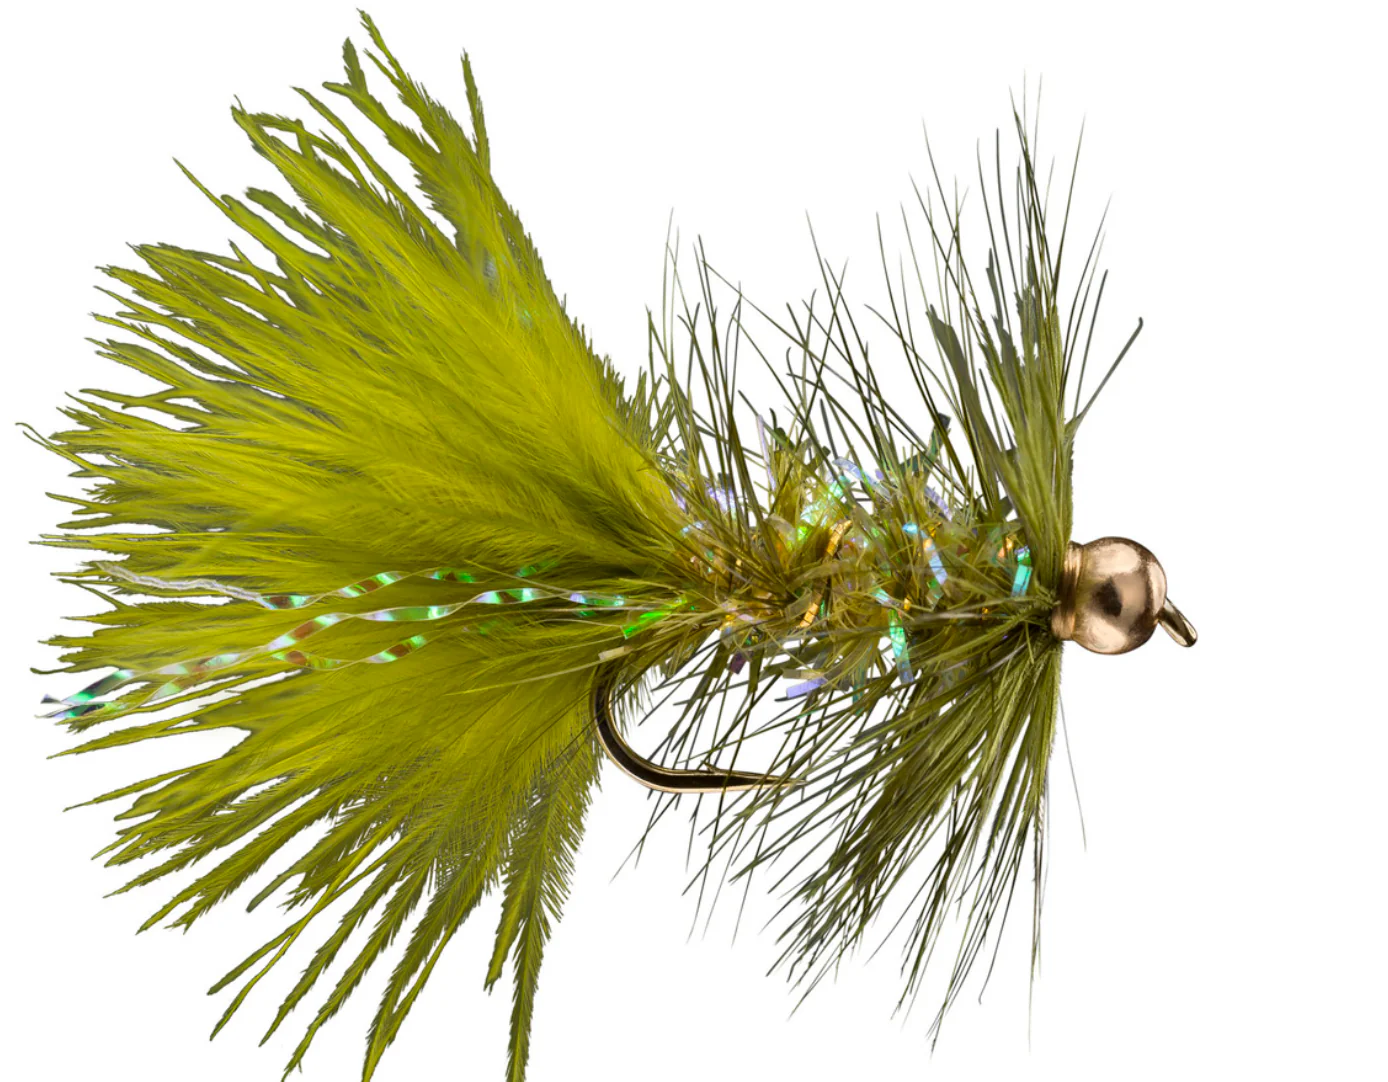
Source: flyfishsd.com
A popular variation that substitutes Estaz or Crystal Chenille for standard chenille in the body. Crystal chenille has a built-in sparkle from the synthetic fibres woven into it, adding flash and attraction without extra materials.
Tying the Crystal Bugger
Identical to the standard Woolly Bugger — simply substitute Crystal Chenille or Estaz for the standard chenille body. The result is a flashier, more visible fly that works particularly well in slightly coloured water or low light conditions.
When to use it: murky water, overcast days, early morning and evening when visibility is lower. The extra flash helps fish locate the fly.
Colour Variations and When to Use Them
The Woolly Bugger is most commonly tied in three colours — each with a different application:
Black
The most versatile and widely used colour. Works in all water conditions and light levels. Black creates a strong silhouette that fish can see clearly even in low light or slightly coloured water. The go-to when you're not sure what to use.
Best for: low light, coloured water, general searching
Olive
The natural colour — imitates leeches, crayfish, and various aquatic invertebrates. Works best in clear water where fish can see colour. Particularly effective for trout in rivers and clear stillwaters.
Best for: clear water, bright conditions, trout
White
Imitates baitfish and small fry. Effective in stillwater when fish are targeting small fish rather than invertebrates. Also useful in saltwater applications.
Best for: stillwater, baitfish imitation, bass
Brown
A natural, earthy colour that imitates crayfish and hellgrammites particularly well. Excellent for bass and less commonly used for trout — which is sometimes exactly why it works.
Best for: bass, crayfish imitation, rivers with natural crayfish populations
Purple and Chartreuse
Attractor colours with no natural equivalent. Surprisingly effective in certain conditions — particularly dirty water, bright sunlight, or when fish have seen a lot of black and olive buggers. Worth carrying a few.
Best for: high, coloured water; heavily fished water where fish have become pattern-shy
How to Fish the Woolly Bugger
Tying the fly is only half the equation. Here's how to get the most out of it on the water:
The Standard Strip Retrieve
Cast across or slightly downstream, let the fly sink briefly, then retrieve with strips of the line hand. Vary your strip length and speed — short, fast strips for an aggressive baitfish action; long, slow strips for a wounded or dying prey item. Pause between strips to let the fly sink and the marabou breathe.
The Swing
Cast across and downstream, then hold the rod tip up as the current swings the fly across the river in a wide arc. Takes often come at the end of the swing as the fly hangs in the current. Add occasional strips during the swing to vary the action.
The Dead Drift
An underused technique — present the Woolly Bugger like a nymph, with a dead drift and no active retrieve. Particularly effective in slow, deep pools where a weighted beadhead bugger sinks and pulses naturally. Often takes the most cautious fish.
Colour Selection on the Water
A simple rule of thumb: dark conditions or coloured water — fish black. Clear water and bright conditions — fish olive or brown. Stillwater targeting baitfish — fish white.
When in doubt, start with black. It's the most visible colour in the widest range of conditions and has accounted for more fish on the Woolly Bugger than any other colour.
🎣 Log which variants work where. As you experiment with colours, sizes, and retrieves, logging your results on Flyloops builds a picture of what works on your home water. Over a season, you'll know exactly which bugger to tie on and when. Start your free logbook →
Frequently Asked Questions
What is the best size Woolly Bugger for trout? Size 8 and 10 cover most trout fishing situations. Go larger (size 4–6) for big fish in autumn, deep pools, or high water. Go smaller (size 12) for clear, pressured water where fish are wary of large flies.
What's the difference between a Woolly Bugger and a Woolly Worm? The Woolly Worm is the Woolly Bugger's predecessor — it has the same palmered hackle body but no marabou tail. The Bugger's marabou tail adds dramatically more movement and is generally more effective. The Woolly Worm is still fished and effective, particularly as a nymph imitation in smaller sizes.
Should I use tungsten or brass beads? Tungsten for fast water and deeper presentations where you need the fly to sink quickly. Brass for slower water and shallower fishing where a lighter fly is sufficient. Tungsten beads are more expensive but the performance difference in fast water is meaningful.
What hackle is best for a Woolly Bugger? Soft, webby saddle or neck hackle with fibres roughly equal to the hook gap in length. Avoid stiff, dry fly hackle — it doesn't move in water and makes the fly look lifeless. Hen back hackle is an excellent choice for maximum movement.
Can I tie a Woolly Bugger without a vise? Technically yes, but it's very difficult. A basic fly tying vise makes the whole process significantly easier and more precise. Entry-level vises are available for $30–$50 and are the single most important piece of tying equipment.
How many Woolly Buggers should I tie before fishing them? Tie at least six before fishing — you'll lose flies to snags, fish, and general attrition. Tie a mix of black, olive, and a beadhead variant in size 8 to start. Having duplicates of your most effective patterns is one of the practical lessons every tyer learns early.
Is the Woolly Bugger good for saltwater? The standard Woolly Bugger isn't salt-rated — the hooks will corrode quickly in saltwater. Saltwater versions tied on corrosion-resistant hooks in white, chartreuse, and tan are effective for inshore species. The Clouser Minnow is a more purpose-built saltwater alternative with a similar movement profile.
Tied your first Woolly Bugger? Log your first session fishing it on Flyloops and track how it performs across different conditions and waters.