How to Tie the Pheasant Tail Nymph: The Complete Guide (All Variants)
Estimated read time: 10 minutes
Few fly patterns have a story as compelling as the Pheasant Tail Nymph. Tied by English river keeper Frank Sawyer in the 1950s on the chalk streams of Wiltshire, it was designed to imitate the slim, dark nymphs of the blue winged olive — one of the most important mayfly species in European rivers. Sawyer tied it without thread, using only copper wire to bind the pheasant tail fibres to the hook. It was precise, sparse, and deadly.
Seven decades later, the Pheasant Tail Nymph is one of the most widely used fly patterns in the world. It's been adapted, modified, and improved by generations of tyers — the beadhead version, the flashback, the soft hackle variant — but the original principle remains: a slim, natural nymph that imitates the most important food source in most trout rivers.
For the beginner tyer, the Pheasant Tail teaches precision. Unlike the forgiving Hare's Ear, proportions matter here — the fly's effectiveness comes from its slim, accurate profile. Tying it well develops the thread control and material management skills that underpin all advanced nymph tying.
This guide covers the standard Pheasant Tail, the beadhead variant, the flashback, and Sawyer's original wire-only version — with step-by-step instructions and an embedded tying video from The Feather Bender.
Table of Contents
- Why the Pheasant Tail Works
- Materials You'll Need
- The Standard Pheasant Tail Nymph: Step by Step
- Tying Video: Pheasant Tail Nymph
- The Beadhead Pheasant Tail
- The Flashback Pheasant Tail
- Sawyer's Original Pattern
- Size and Colour Variations
- How to Fish the Pheasant Tail
- Frequently Asked Questions
Why the Pheasant Tail Works
The Pheasant Tail's effectiveness comes from its accuracy. Unlike the impressionistic Hare's Ear, the Pheasant Tail closely imitates the slim, dark profile of a mayfly nymph — the most important food source in most trout rivers worldwide.
The pheasant tail fibres: the centre tail fibres of a cock pheasant have a unique combination of colour, texture, and segmentation that perfectly imitates a mayfly nymph's abdomen. Wrapped around the hook shank, the natural barring of the fibres creates a segmented effect without any additional ribbing. Their warm brown colour matches the majority of mayfly species across the globe.
The slim profile: mayfly nymphs are slim, streamlined insects. The Pheasant Tail tied correctly — sparse, tapered, precise — matches this profile in a way that bulkier patterns can't. In clear water, on selective fish, this accuracy matters.
Versatility of size: tied from size 10 down to size 20, the Pheasant Tail covers everything from large stonefly nymph imitations to tiny midge larvae. No other single pattern spans such a useful size range while maintaining its effectiveness.
Materials You'll Need
For the Standard Pheasant Tail Nymph
| Material | Specification | Notes |
|---|---|---|
| Hook | Nymph hook, size 10–20, standard or 2XL | Tiemco 3769, Mustad C49S, or equivalent |
| Thread | 8/0, brown or rust | Keep it fine — bulk is the enemy |
| Tail | Cock pheasant centre tail fibres | 3–4 fibres, hook gap length |
| Rib | Fine copper wire | Essential for durability |
| Abdomen | Cock pheasant centre tail fibres | 4–6 fibres wrapped forward |
| Thorax cover (wing case) | Cock pheasant centre tail fibres | 6–8 fibres folded over thorax |
| Thorax | Cock pheasant centre tail fibres or peacock herl | Fuller than abdomen |
| Legs | Tips of wing case fibres, divided either side | Optional but effective |
For the Beadhead Variant
Everything above, plus:
- Brass or tungsten bead, sized to hook
One Material, Most of the Fly
One of the elegant things about the Pheasant Tail is that a single material — cock pheasant centre tail fibres — forms the tail, abdomen, wing case, and legs. You need very little else. A single pheasant tail feather contains enough material for dozens of flies.
Sourcing pheasant tail: available from any fly tying supplier. Natural (undyed) cock pheasant centre tail fibres are the standard. A single large feather costs $1–$3 and lasts a very long time.
Tools Required
- Fly tying vise
- Bobbin and thread
- Fine-tipped scissors
- Hackle pliers (for wrapping fibres)
- Whip finisher
- Head cement or UV resin
The Standard Pheasant Tail Nymph: Step by Step
Step 1: Set Up the Hook
Secure the hook in the vise. Start your thread behind the eye and wrap a fine, smooth thread base back to the bend. Keep the thread base as thin as possible — the Pheasant Tail is a slim fly and every unnecessary wrap of thread adds unwanted bulk.
Step 2: Select and Tie In the Tail
Select 3–4 pheasant tail fibres from the centre of the feather where the barring is most distinct. Align the tips and tie them in at the bend with several firm wraps of thread. The tail should extend approximately one hook gap length beyond the bend — short and precise, not long and flowing.
Tip: use fewer fibres than you think you need. Three fibres for a size 16 hook is plenty. The Pheasant Tail's effectiveness comes from its slim profile — resist the urge to add more material.
Step 3: Tie In the Copper Wire Rib
Tie in a length of fine copper wire at the bend alongside the tail fibres. Let it hang while you build the abdomen. The wire rib serves two purposes: it creates the segmented appearance of a natural nymph abdomen, and it counter-wraps over the pheasant tail fibres to lock them in place and dramatically extend the fly's durability.
Step 4: Tie In the Abdomen Fibres
Select 4–6 pheasant tail fibres and tie them in at the bend by their tips, alongside the tail and rib. These fibres will be wrapped forward to form the abdomen — you're tying them in at the same point as the tail but they face forward along the shank, ready to be wrapped.
Step 5: Wrap the Abdomen
Using hackle pliers to grip the pheasant tail fibres, wrap them forward in touching, slightly overlapping turns toward the eye, stopping about one-third of the way back from the eye to leave room for the thorax and wing case. Tie off and trim the excess.
Tip: keep the fibres under consistent tension as you wrap. Loose wraps create gaps and unevenness; tight, consistent wraps produce the smooth, segmented abdomen that makes this fly so effective.
Step 6: Counter-Wrap the Rib
Wrap the copper wire forward over the abdomen in the opposite direction to the pheasant tail wraps — 5–6 evenly spaced turns. This counter-wrapping locks the pheasant tail fibres against the hook shank, preventing them from unravelling when a fish takes the fly or the fibres get damaged. Tie off and trim.
Tip: the copper wire rib is what makes a Pheasant Tail durable. An unribbed Pheasant Tail may last one or two fish before the pheasant tail fibres start to unravel. A properly ribbed one can catch a dozen fish and still look fishable.
Step 7: Tie In the Wing Case Fibres
Select 6–8 pheasant tail fibres and tie them in by their tips at the point where the abdomen ends, with the fibres extending forward over the eye. These will be folded back over the thorax to create the wing case — leave them pointing forward for now.
Step 8: Build the Thorax
Apply a small amount of thread dubbing — a fine dubbing like superfine or beaver — or wrap 3–4 peacock herl fibres forward to build a slightly fuller thorax. The thorax should be noticeably wider than the abdomen, imitating the broader thorax of the natural nymph. Stop just behind the eye.
Tip: peacock herl produces a beautifully iridescent thorax that many tyers prefer. Wind it carefully — herl is fragile and breaks easily under thread tension. Counter-wrap with fine wire or thread after wrapping to add durability.
Step 9: Fold the Wing Case
Bring the pheasant tail fibres back over the top of the thorax and tie them down firmly behind the eye. The fibres should lie flat and taut, creating a dark wing case over the thorax. Do not trim the remaining fibre tips yet.
Step 10: Divide the Legs
Divide the remaining fibre tips into two equal groups and fold them back on either side of the thorax to suggest legs. Secure with a few thread wraps on each side. Trim to approximately the length of the thorax.
This step is optional — many effective Pheasant Tail patterns omit the legs entirely — but it adds a realistic detail that can make a difference on selective fish.
Step 11: Build the Head and Finish
Build a small, neat thread head. Whip finish and apply head cement or UV resin. The finished fly should be slim, precisely proportioned, and dark — a convincing mayfly nymph silhouette.
Tying Video: Pheasant Tail Nymph
The Feather Bender brings exceptional clarity to the Pheasant Tail — pay particular attention to their technique for wrapping the pheasant tail fibres evenly and counter-wrapping the rib for durability.
Video credit: The Feather Bender — detailed, methodical instruction for classic nymph patterns.
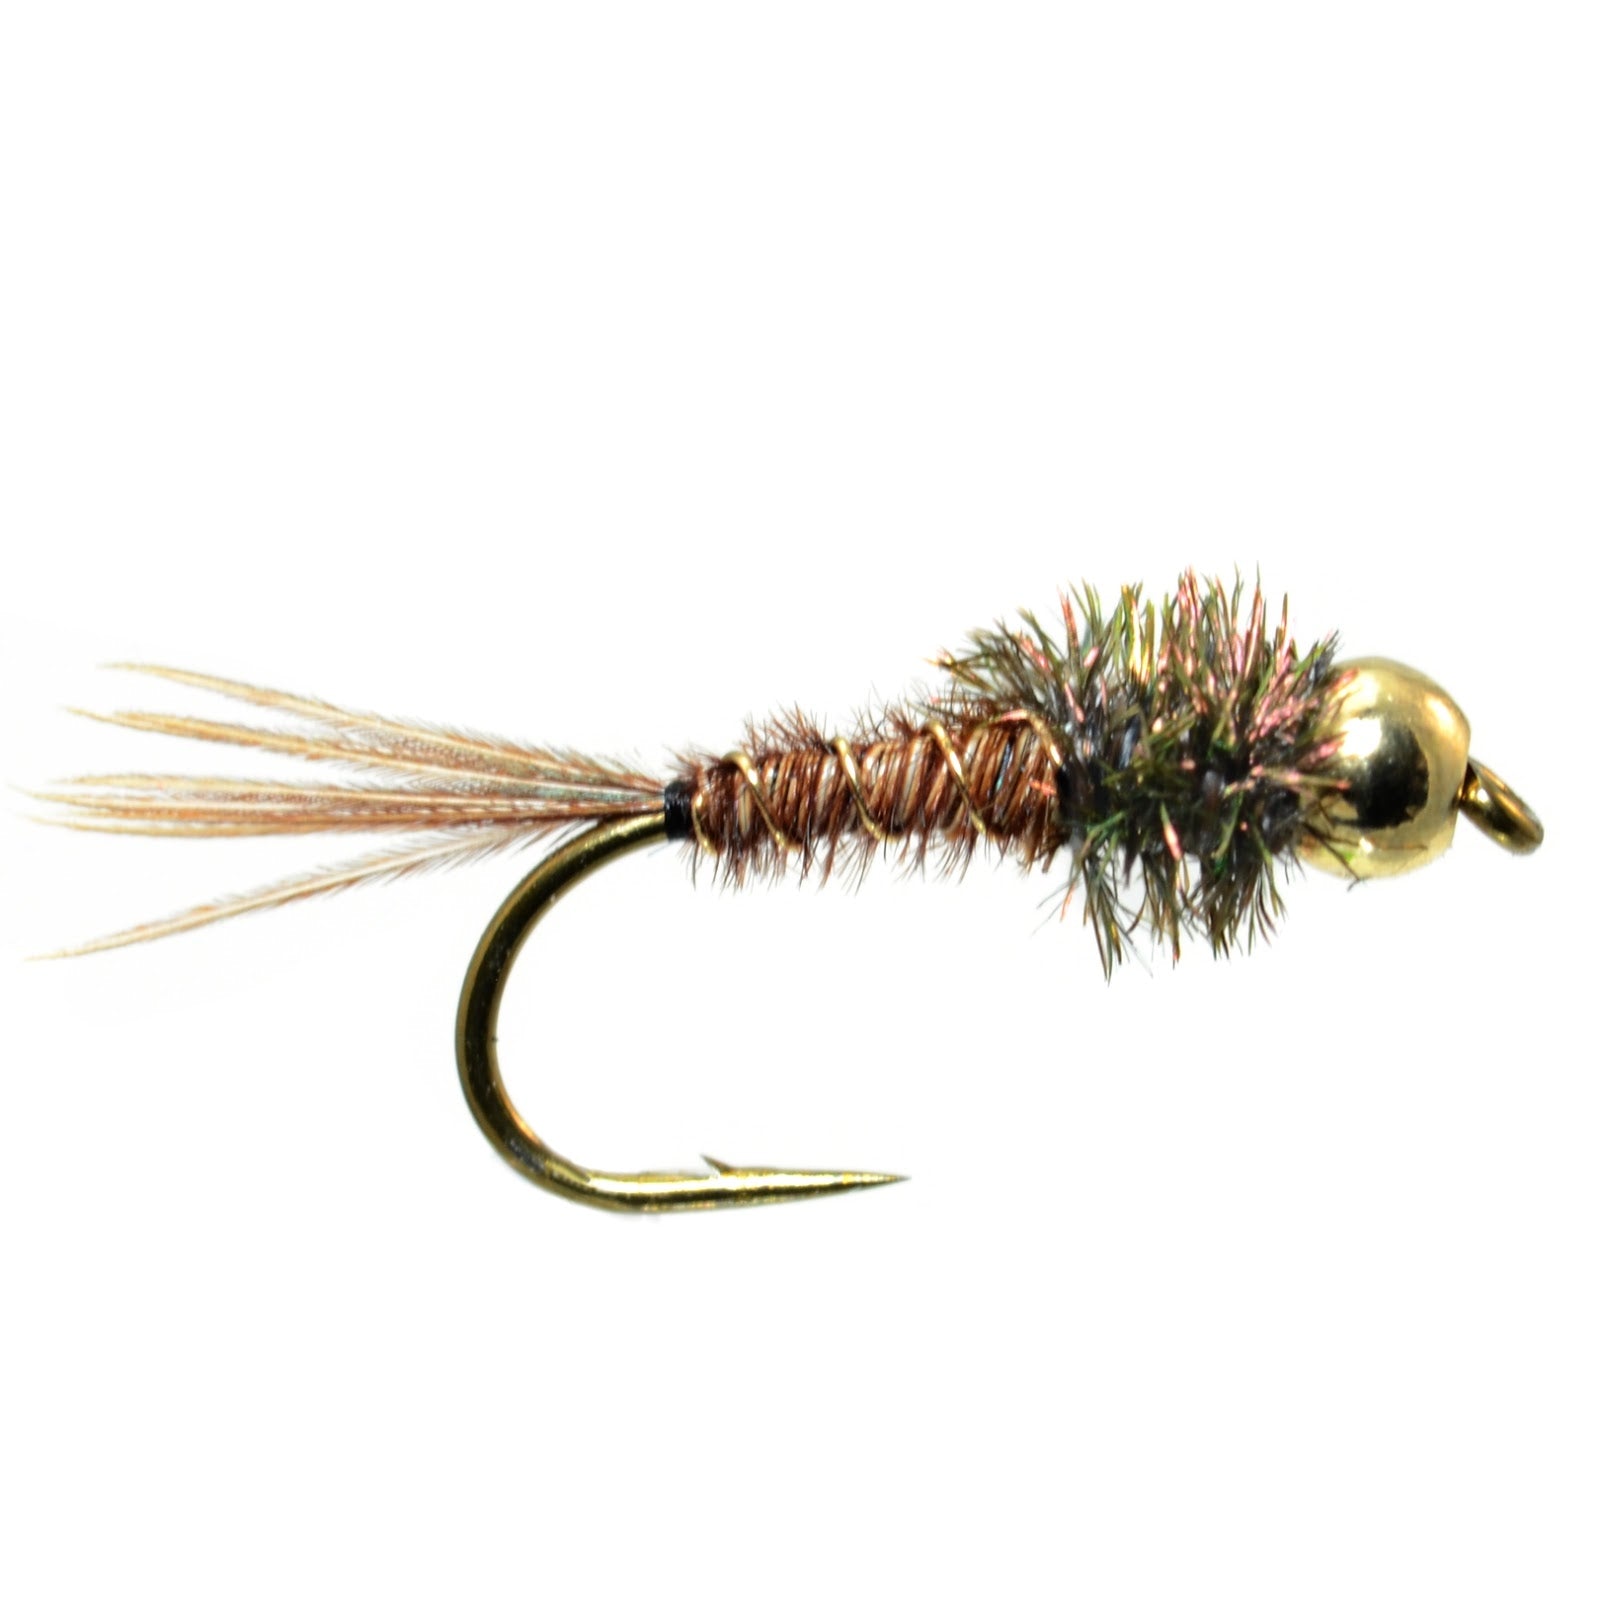
The Beadhead Pheasant Tail
The beadhead variant is arguably more widely used than the original today. The addition of a tungsten or brass bead at the head sinks the fly faster, adds a flash point that attracts fish, and creates a jigging action that imitates the swimming motion of an ascending nymph.
How to Tie the Beadhead Variant
Before starting your thread, slide the bead onto the hook with the small hole facing the point. Push it up to the eye. Start your thread behind the bead and proceed exactly as for the standard pattern. The bead sits at the head of the finished fly, replacing the thread head.
Bead sizing guide:
| Hook Size | Bead Size |
|---|---|
| Size 10 | 3.2mm |
| Size 12 | 2.8mm |
| Size 14 | 2.4mm |
| Size 16 | 2.0mm |
| Size 18 | 1.5mm |
Gold vs silver bead: gold beads are the most common and most versatile. Silver beads work well in clear water and bright conditions where a more subtle flash is appropriate.
The Flashback Pheasant Tail
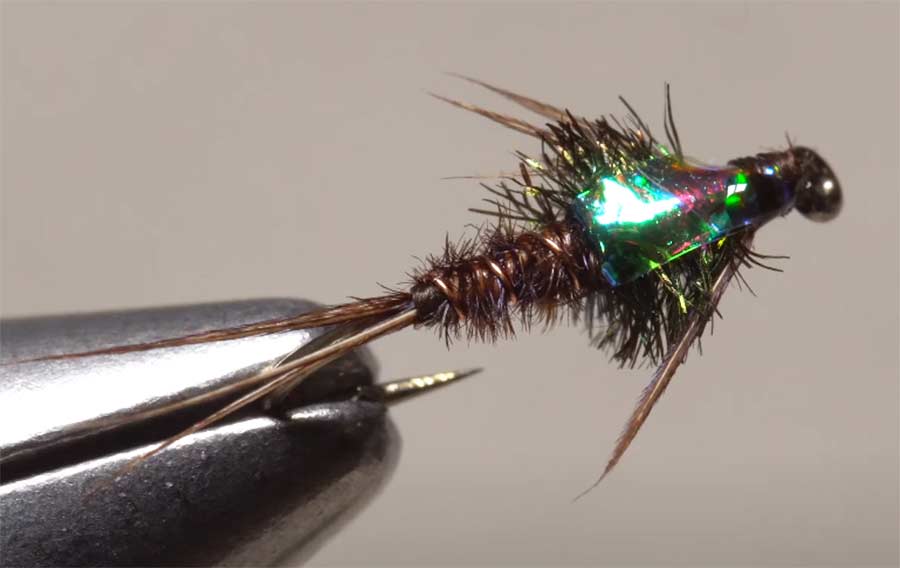
Source: news.orvis.com
A popular modern variant that adds a strip of pearl or holographic tinsel over the wing case. The flash imitates the air bubble trapped beneath the nymph's wing case during emergence — a highly visible trigger for feeding fish.
How to Tie the Flashback Variant
When tying in the wing case fibres in Step 7, also tie in a narrow strip of pearl Mylar or Flashabou alongside the pheasant tail fibres. When folding the wing case over the thorax in Step 9, fold both the pheasant tail fibres and the flash strip back together. The flash strip sits on top, creating a bright highlight along the centre of the wing case.
When to use it: during hatch periods when nymphs are actively ascending and trapping air bubbles. Also effective in slightly coloured water where extra visibility helps fish locate the fly.
Sawyer's Original Pattern
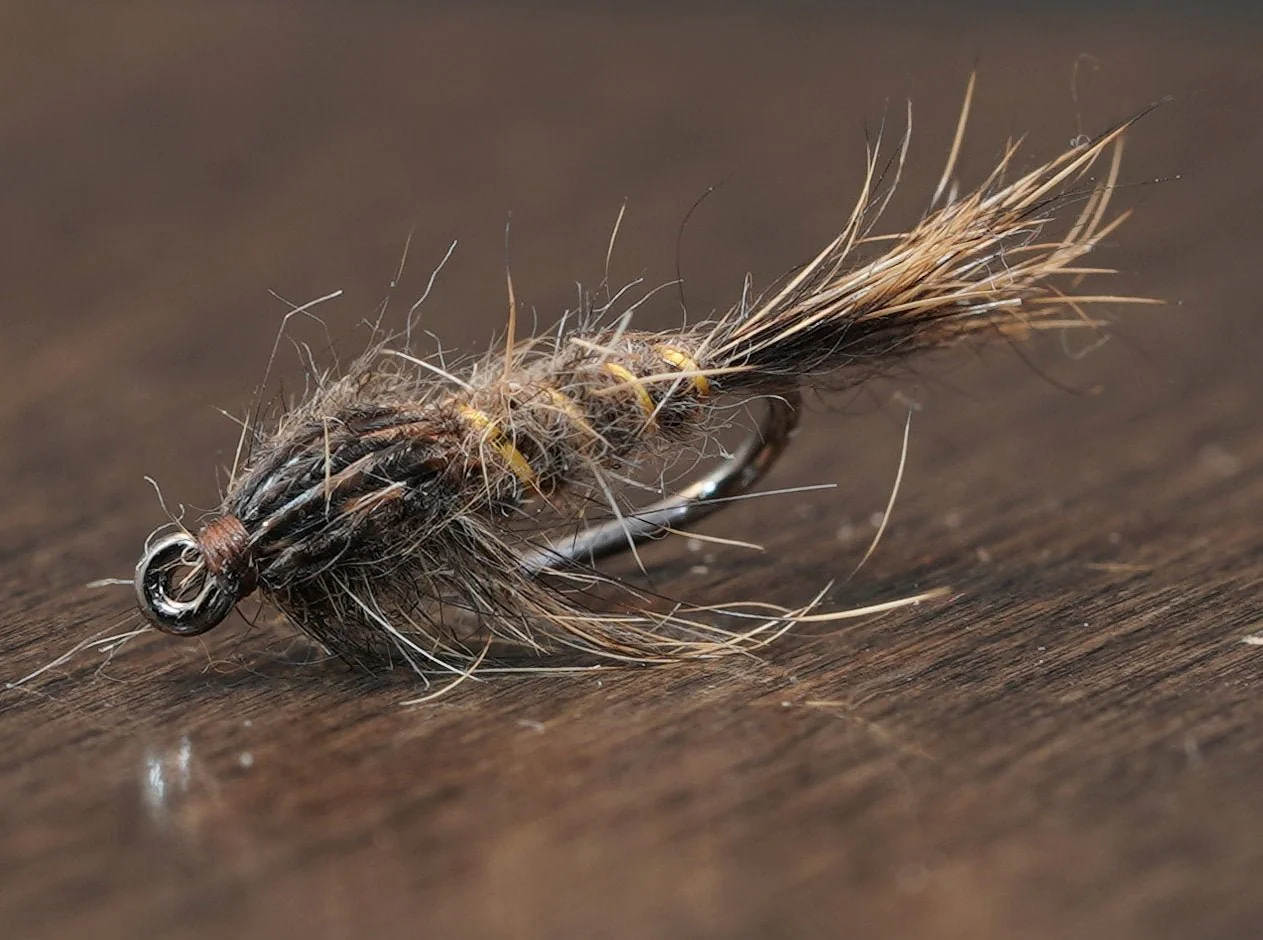
Frank Sawyer's original Pheasant Tail used no thread at all — just fine copper wire to bind the pheasant tail fibres directly to the hook. The result is an extraordinarily slim, dense fly that sinks quickly and has a unique weight and feel in the water.
Key Differences
- No thread: copper wire does everything — lashing down materials and forming the body
- No separate wing case: the pheasant tail fibres are looped back over the thorax using the copper wire only
- Extremely slim: the absence of thread reduces bulk to an absolute minimum
Sawyer's original is worth tying once you're comfortable with the standard pattern. It's more demanding but produces a beautiful, historically significant fly that still catches fish on the chalk streams it was designed for.
Size and Colour Variations
Size
The Pheasant Tail's effectiveness spans an extraordinary size range:
- Size 10–12: large mayfly and stonefly nymph imitation; fast water; high water searching
- Size 14–16: the most useful all-round sizes; covers the majority of everyday nymphing
- Size 18–20: small stream fishing, clear low water, selective fish, Baetis imitation
- Size 22+: ultra-fine midge larvae imitation for tailwater fishing
Colour
Natural pheasant tail (warm brown): the standard. Matches the majority of mayfly species globally. Carry this in sizes 14–18 before anything else.
Olive: tie the thorax with olive dubbing or substitute olive-dyed pheasant tail fibres for the abdomen. Effective for BWO (Blue Winged Olive) hatches.
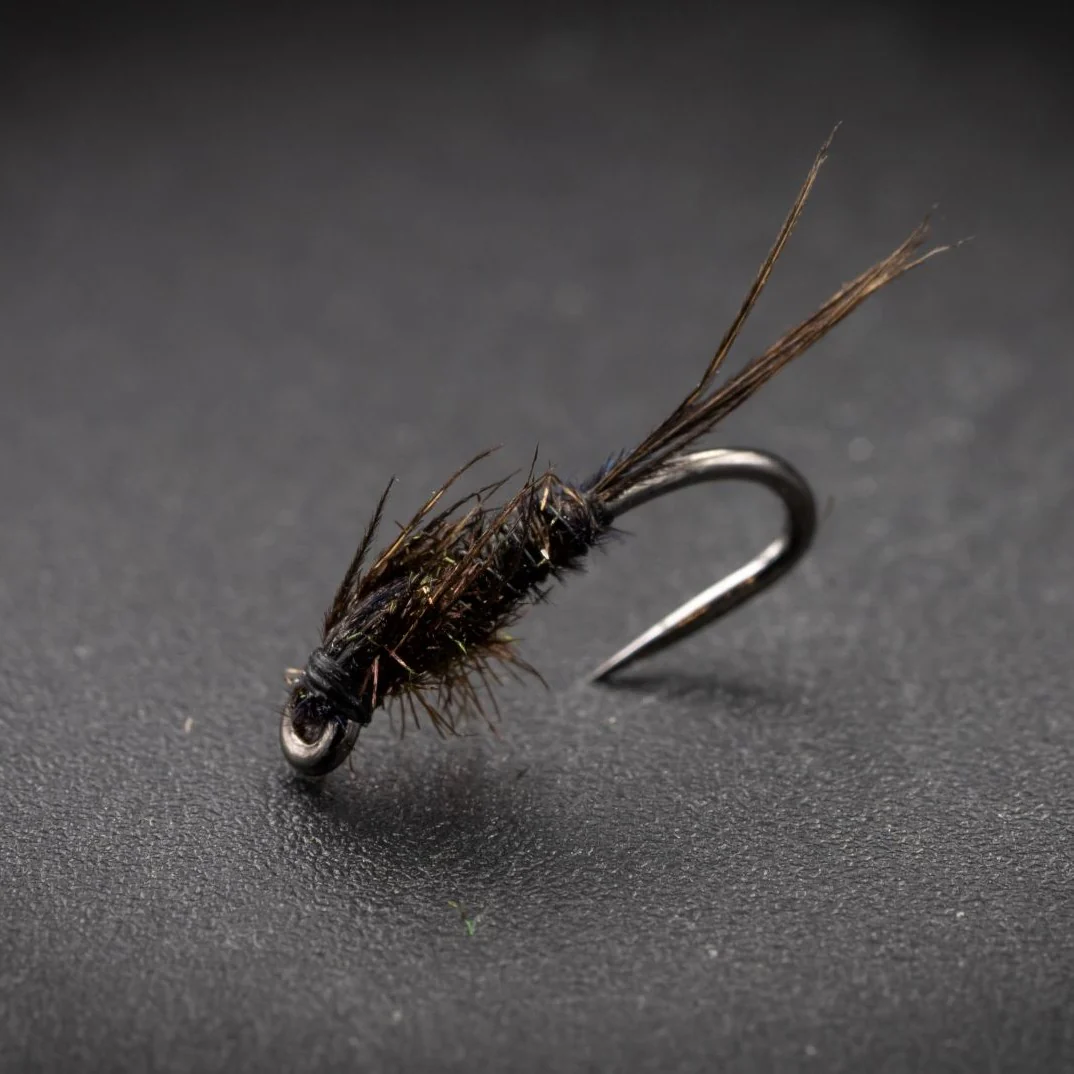
Dark/black: darker pheasant tail with a black bead for stonefly imitation and fishing in coloured water.
How to Fish the Pheasant Tail
Dead Drift Nymphing with Indicator
The standard presentation. Cast upstream, mend the line, and allow the fly to drift naturally near the bottom through likely feeding lies. Watch the indicator for any pause, twitch, or unnatural movement — takes on a dead-drifted Pheasant Tail are often subtle. Strike immediately at any anomaly.
The Sawyer Method (Induced Take)
Frank Sawyer's own technique for fishing his pattern. Cast upstream and across to a visible fish, allow the fly to sink to the fish's depth, then raise the rod tip as the fly reaches the fish — inducing a take by lifting the fly upward exactly as it passes through the fish's feeding lane. Highly effective on visible fish in clear water.
Euro Nymphing
A slim, heavy beadhead Pheasant Tail on a jig hook is one of the most effective Euro nymphing patterns available. The fly's slim profile cuts through fast water quickly, getting into the feeding zone without excessive weight. Fish tight-line with a direct connection to the fly and strike at any hesitation in the sighter.
Dry-Dropper
Suspend a beadhead Pheasant Tail below a high-floating dry fly as the nymph component of a dry-dropper rig. The Pheasant Tail's slim profile creates minimal drag on the dry fly above it, making it one of the best dropper patterns for this technique.
🎣 Track which nymph produces on your water. The Hare's Ear and Pheasant Tail are the two nymphs most anglers carry — but which one produces more fish on your specific water varies. Logging your fly selection and catch results on Flyloops answers that question over a season. Start your free logbook →
Frequently Asked Questions
What is the best size Pheasant Tail Nymph? Size 14 is the most versatile starting point for most rivers. Go smaller (16–18) for clear, low water, pressured fish, or during Baetis hatches. Go larger (10–12) in fast or high water, or when larger mayfly species are present.
What's the difference between the Pheasant Tail and the Hare's Ear? The Pheasant Tail is slim, smooth, and specifically imitates mayfly nymphs. The Hare's Ear is bulkier, rougher, and more impressionistic — it suggests a wider range of invertebrates. Both are essential. When fish are feeding selectively on slim, dark nymphs, the Pheasant Tail generally outperforms the Hare's Ear.
Why does my Pheasant Tail look fat and lumpy? Too much material is the most common cause. Use fewer pheasant tail fibres (3–4 for the tail, 4–5 for the abdomen), keep your thread wraps minimal, and wrap the fibres tightly and evenly. The Pheasant Tail should look spare and precise — if it looks bulky, start again with less material.
What pheasant feather should I use? Centre tail fibres from a cock pheasant — the long, barred feathers from the centre of the tail. These have the most distinct barring and the right fibre length for most hook sizes. Avoid body feathers, which have different fibre characteristics. Natural (undyed) is standard; dyed olive or dark versions are useful for specific hatch-matching.
Do I need to use peacock herl for the thorax? No — the standard pattern uses pheasant tail fibres for the thorax too, which is simpler and perfectly effective. Peacock herl produces a beautifully iridescent thorax that many tyers prefer, but it's fragile and breaks easily. If you use peacock herl, always counter-wrap with fine wire or thread to add durability.
Should I tie the Pheasant Tail with or without legs? Both work well. The leg detail adds realism that can make a difference on selective fish in clear water. For general fishing and fast water, omitting the legs simplifies tying without noticeably affecting effectiveness. Tie both and compare results on your home water.
How many should I tie before fishing? Tie at least eight to ten before your first session — a mix of standard and beadhead in sizes 14 and 16. Pheasant tail fibres are fragile and the fly has a shorter life than a well-ribbed Hare's Ear or Woolly Bugger, particularly if you skip the copper wire rib. Running out mid-session is avoidable.
Tied your first Pheasant Tail? Log your first session on Flyloops and start tracking which nymph patterns produce on your water.